▲
Fossil Preparation 2
PREPARATION OF DINOSAUR TIBIA FOUND AT ERIC THE RED WEST DURING THE 2016 FIELD TRIP
By Lesley Kool
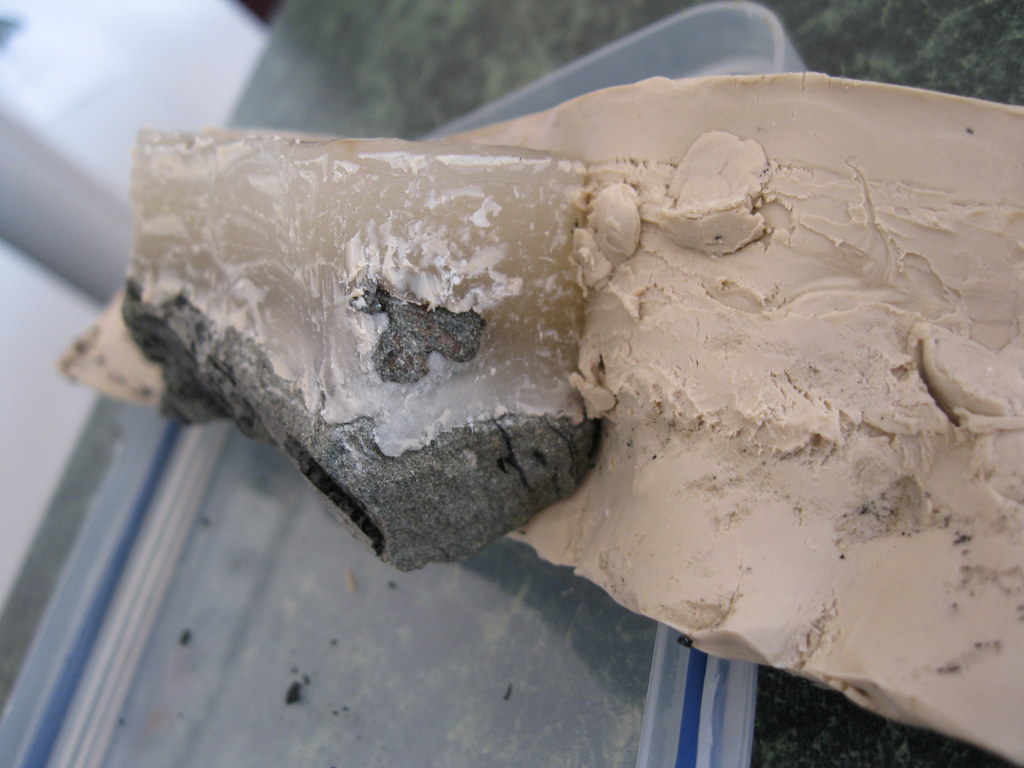
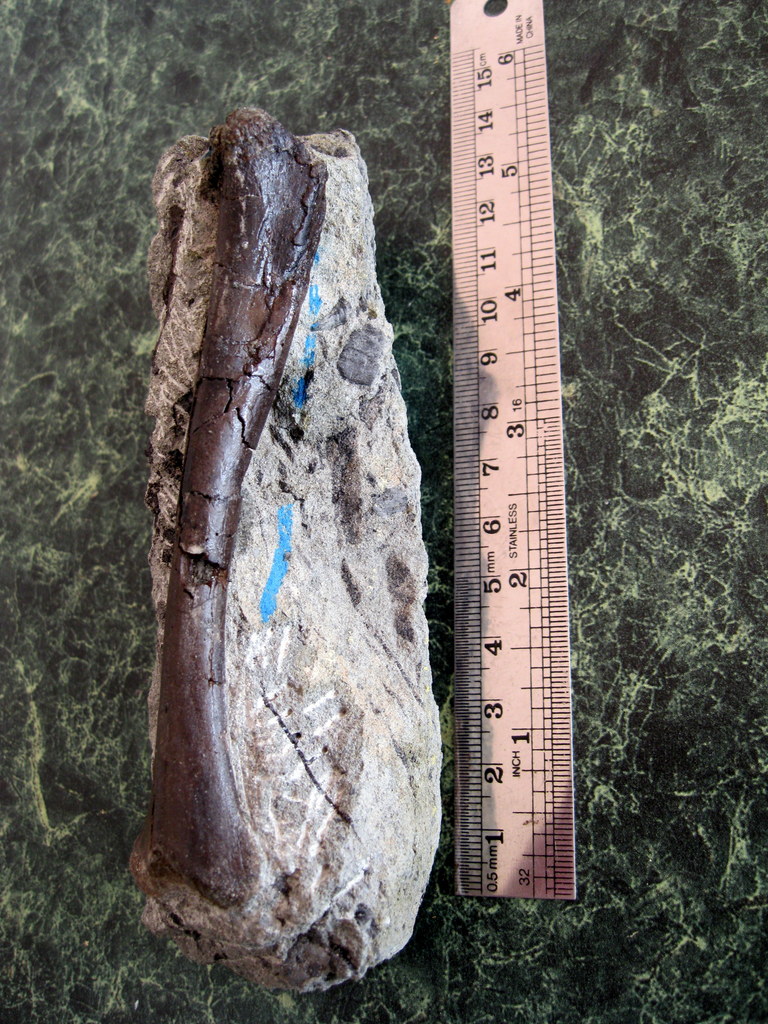
As mentioned in the May update, we are embarking on the description of the preparation of a number of fossil bones found at the Eric the Red West site, during the 2016 field season. The first bone was chosen because it was broken to expose an oblique cross-section through a hollow shaft (image #1) and was tentatively identified as an ulna (bone in the fore-arm) in the field catalogue.
Before removal of the surrounding rock could begin the bone was cleaned of any residual sand or mud and then it was stabilised using a weak solution of PARALOID and acetone. Paraloid is a thermoplastic resin, used by conservators, that is purchased as clear plastic pellets, which dissolve in acetone. Various viscosities can be achieved depending on the percentage of paraloid to acetone; 2%-3% paraloid to acetone produces a very weak solution which is ideal for penetrating the fossil bone, strengthening and supporting the internal structure of the bone. Higher percentages between 20% and 30% paraloid produces a thicker solution which can be used as a glue to join broken pieces of bone together.
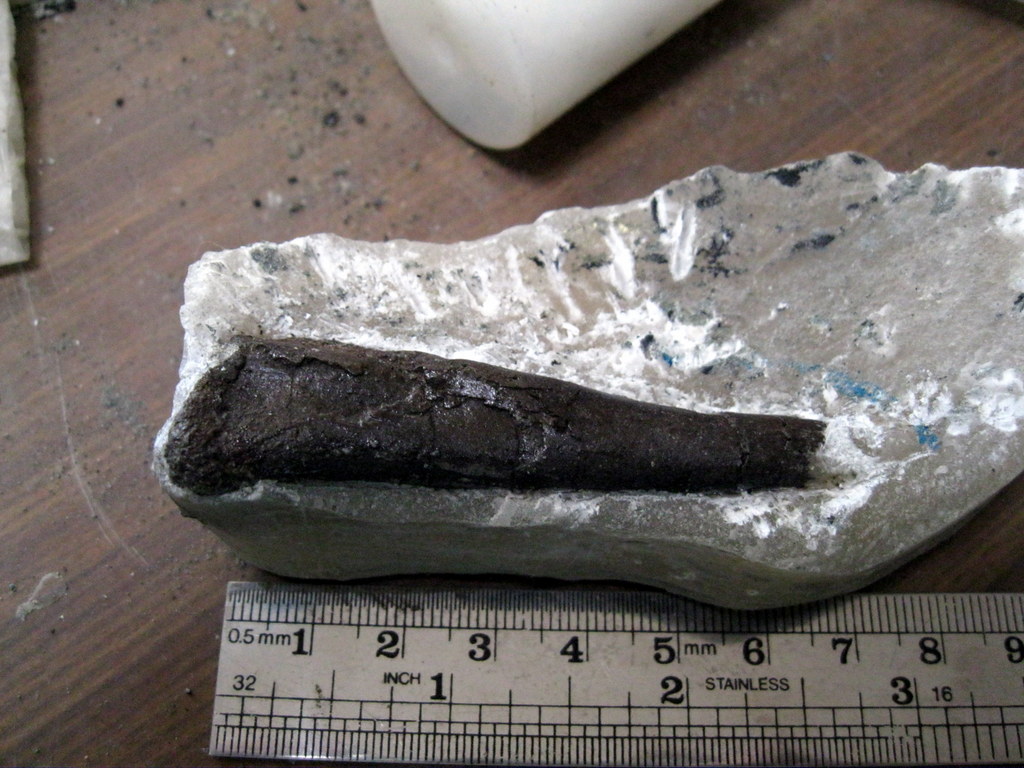
The weak solution of paraloid was applied to all surfaces of the bone with a small paintbrush. One end of the bone was partially exposed (image #2). Using a pneumatic tool called an ARO, which looks like a large texta on the end of a flexible hose, some of the rock surrounding the end of the bone was carefully removed. The ARO works by compressed air forcing the tungsten carbide tip to move forward and backwards at very high speed, producing a jack-hammer type action, which chips away at the surface of the rock. The other end of the bone was still covered by matrix, which had to be removed to determine how much of the bone was preserved. Once again, the ARO was used to remove the matrix, happily revealing the expanded end of the bone (image #3). There was some crushing of the shaft evident as it was exposed, as well as micro fractures throughout the bone. Crushing often occurs due to compaction of the sediments over millions of years as the soft sandy substrate slowly hardens to sandstone. The application of paraloid to the bone as the bone becomes exposed is important to prevent loose bone fragments from being dislodged by the vibrations caused by the ARO.
Once both ends of the bone were exposed the decision on how to join the two halves together had to be made. There are a number of ways that a preparator can proceed and it is very much a personal choice. At this stage the two halves of bone and rock could be glued together and the bone removed from the rock as a whole or one half could be removed and glued onto the other half and then the whole bone is removed or both halves could be removed separately and glued back together again once they were free of matrix. In this case it was decided to remove one half of the bone and glue it onto the second half. Now that both ends of the bone were exposed it now became clear that it was a tibia (lower leg bone) of a small dinosaur. The half which was originally partly exposed was the proximal end, or the end closest to the body which would have been attached to the femur (upper leg bone). The other end of the bone is called the distal end because it is the end furthest from the body. The distal half of the bone was not as badly crushed as the proximal end and also preserved the impression of the other end of the bone, so it was decided to remove the proximal end of the bone first and attach it to the distal end.
As the proximal end was crushed it meant that the chance of the bone coming away cleanly from the rock without further damage was poor. In cases where a bone is very fragile or crushed it is often advisable to support the exposed part of the bone during preparation to prevent further damage. The method we used in this case was to encase the exposed bone in a low temperature melting polyether compound called POLETHYLENE GLYCOL or PEG, sometimes referred to as CARBOWAX. As well as melting at a low temperature it is also dissolvable in water and is often used in marine archaeology to preserve timber from ancient ships.
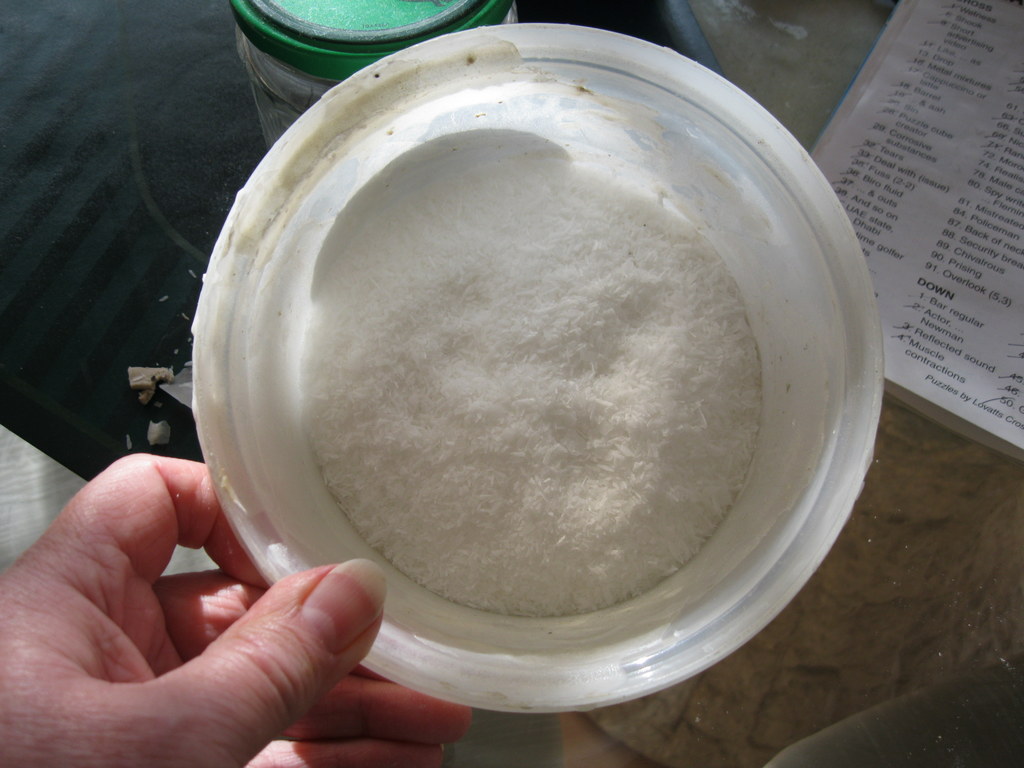
A plasticine wall was erected around the perimeter of the rock holding the proximal end of the bone (image #4). The wall was tall enough to allow at least 2-3cms of wax above the surface of the rock. The PEG, which looks like white flakes, can be melted in a microwave oven on a medium heat setting as long as it is checked every 30 seconds or so. Once the flakes have begun to melt it can be removed as the residual heat will continue to melt the remaining wax (image #6).
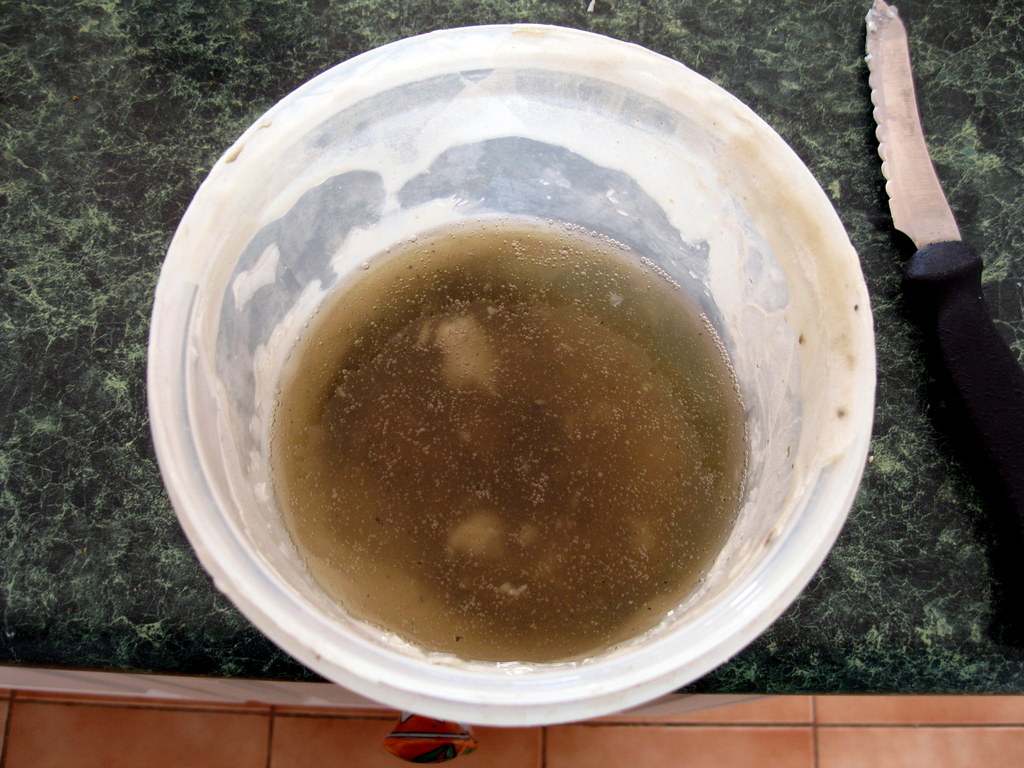
It is very important to make sure that there are no gaps between the perimeter of the rock and the plasticine wall as the liquid PEG will escape and pour out onto the surface below (I know this from experience). It is also important that the PEG is not too hot when you pour it into the plasticine mould as it can melt the plasticine, resulting in a messy combination. I usually wait until the PEG is starting to congeal but is still liquid enough to pour into the mould (image #7). The PEG is poured in quite slowly so that it can penetrate any cavities in the rock and not leave air bubbles which can weaken the mould. The PEG cools and solidifies quite quickly, depending on the ambient temperature. Once it turns opaque and is firm to the touch the plasticine wall is carefully peeled away and the rest of the rock can be removed mechanically, leaving the bone sitting on the PEG (image #9).
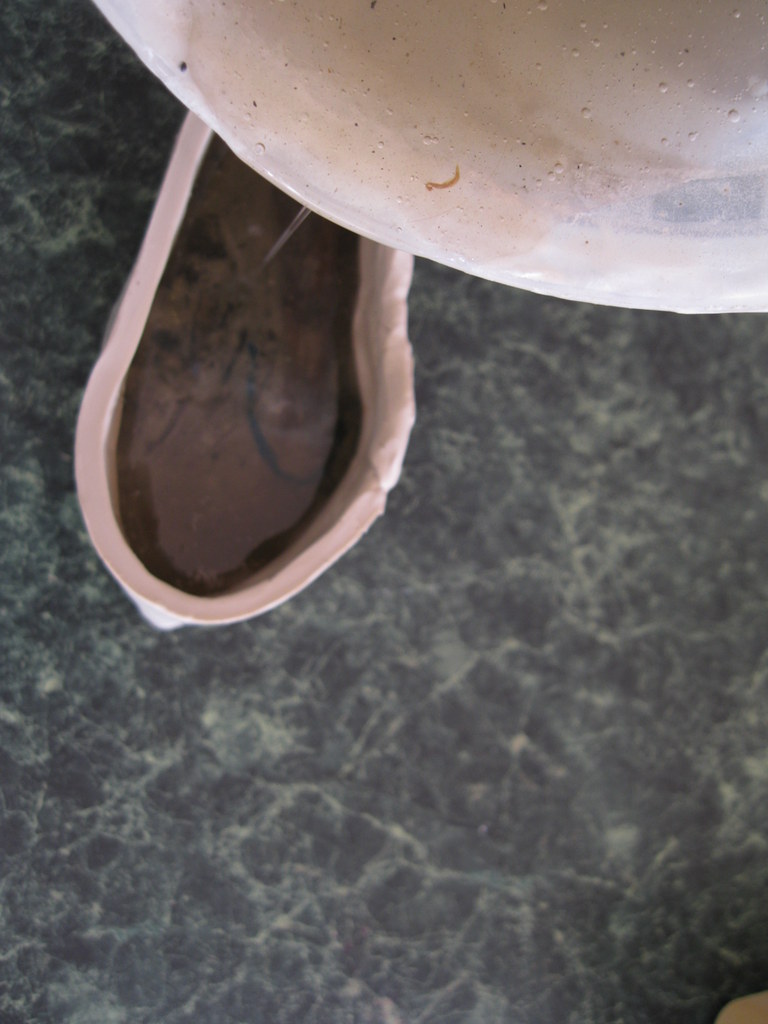
Once the newly exposed bone has been stabilised with Paraloid the PEG can be removed, either by carefully chipping it away from the bone with a blunt needle or placing it on a wire stand over an oven-proof tray (image #10) and placing it into a warm over (around 75°C). As the PEG melts the bone gently settles onto the wire mesh. The bone is then placed into a bowl of warm water to dissolve any residual PEG and then allowed to completely dry before handling (image #11).
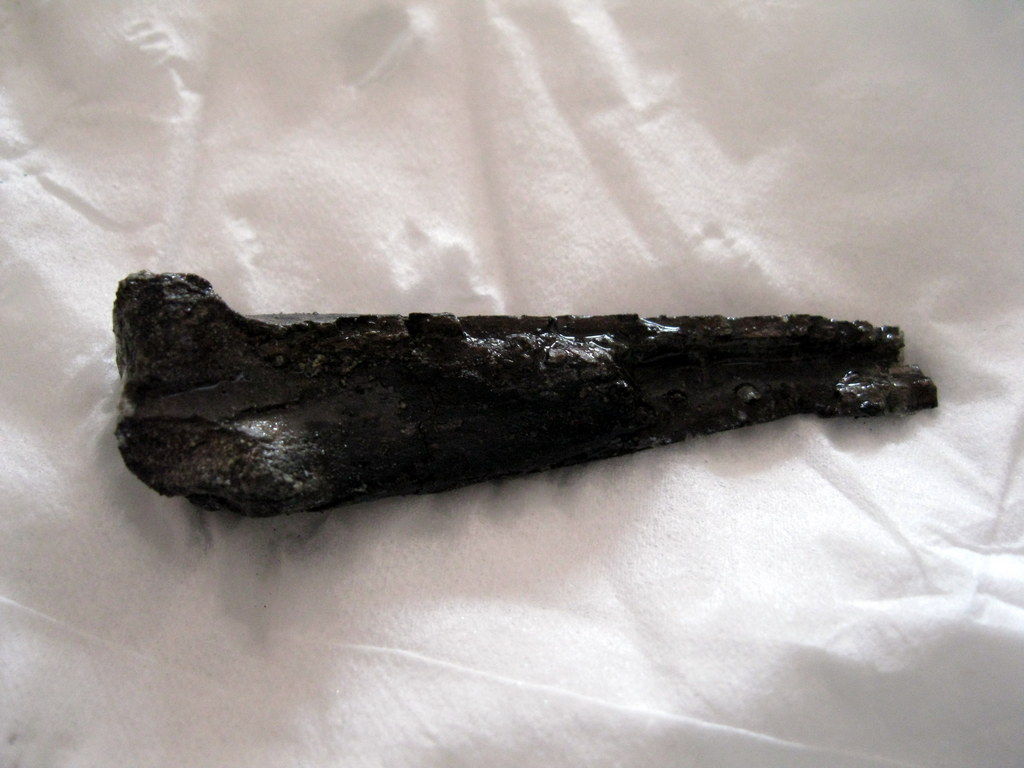
Once the proximal end of the bone was dry it was carefully glued onto the distal end of the bone, using super glue (image #12). The bone then had its final preparation using the ARO to completely remove it from the rock (image #13).
The bone measured almost 12cms in length, giving an estimated length of around one metre for the little dinosaur from which it came. Next month we will follow the preparation of a second tibia, which is quite different from this one.
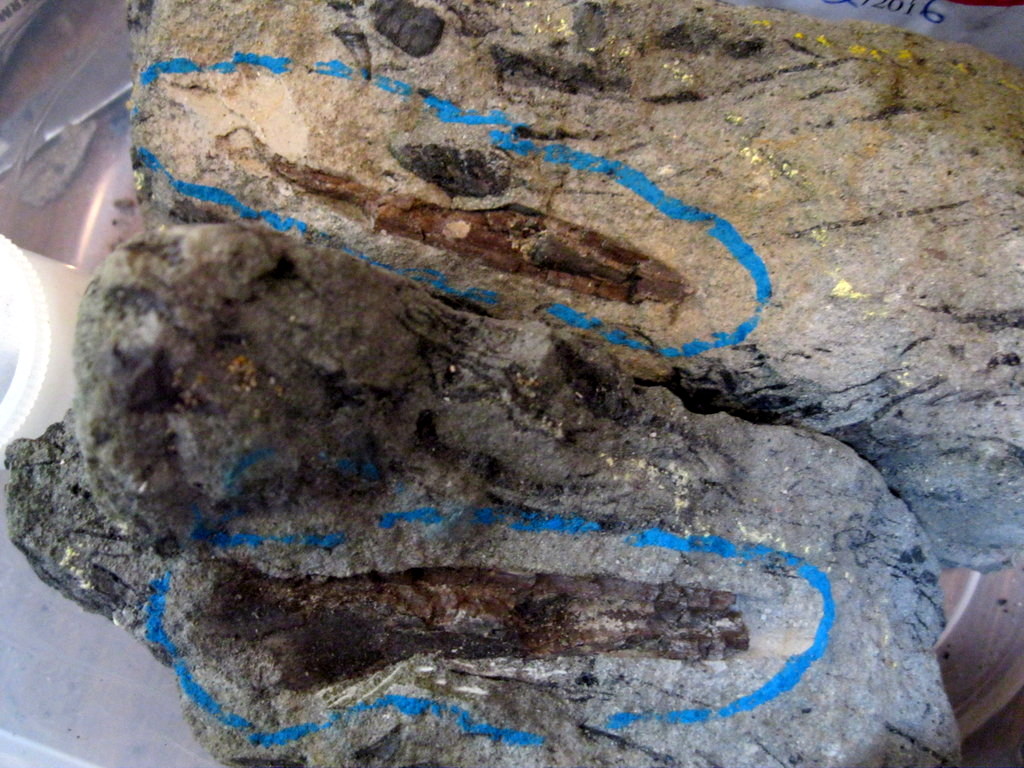
#1 two halves of limb.
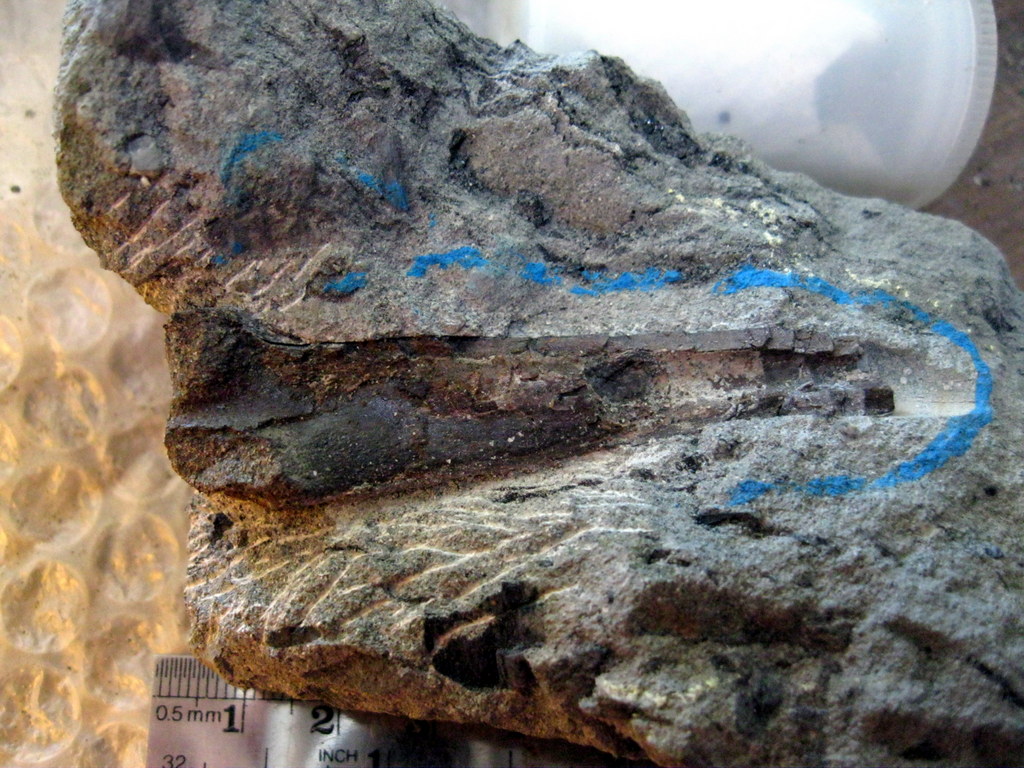
#2 proximal end of limb.
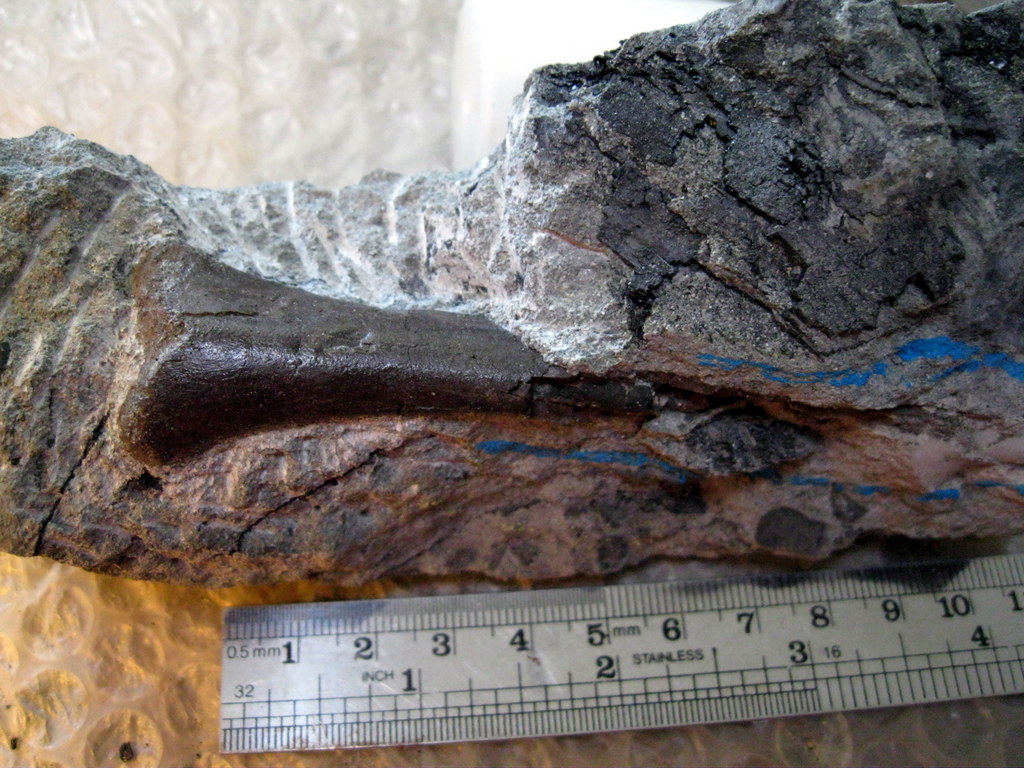
#3 distal end of limb.
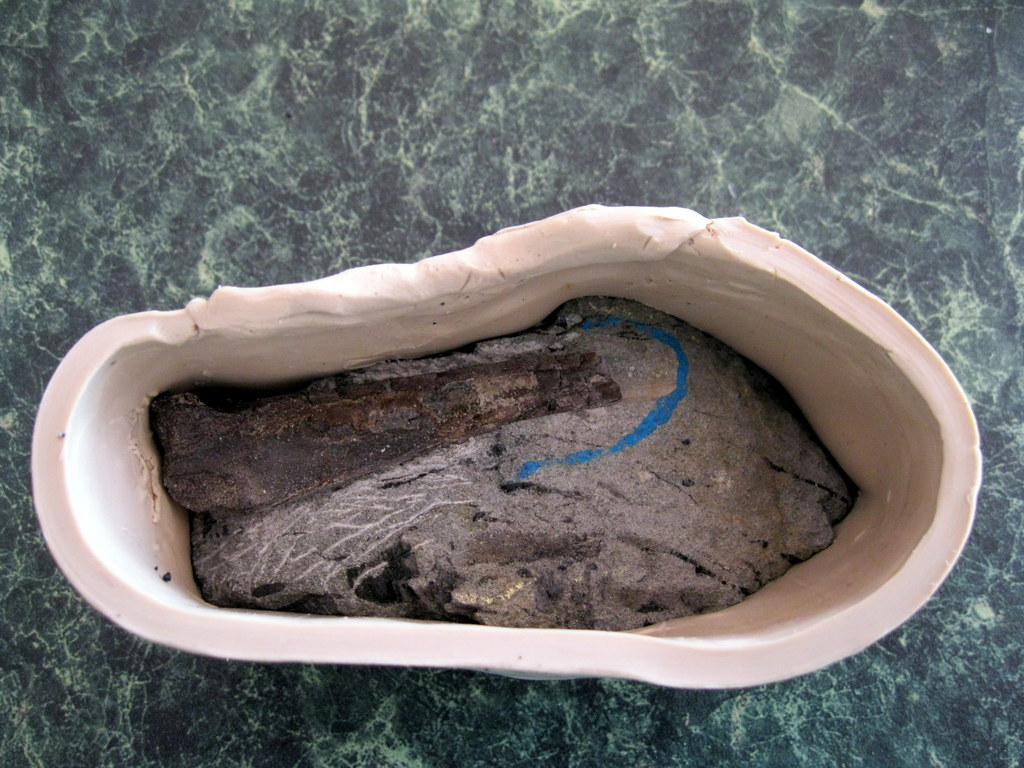
#4 plasticine wall.
#5 peg.
#6 peg melted.
#7 pouring peg.
#8 removing wall.
#9 rock removed.
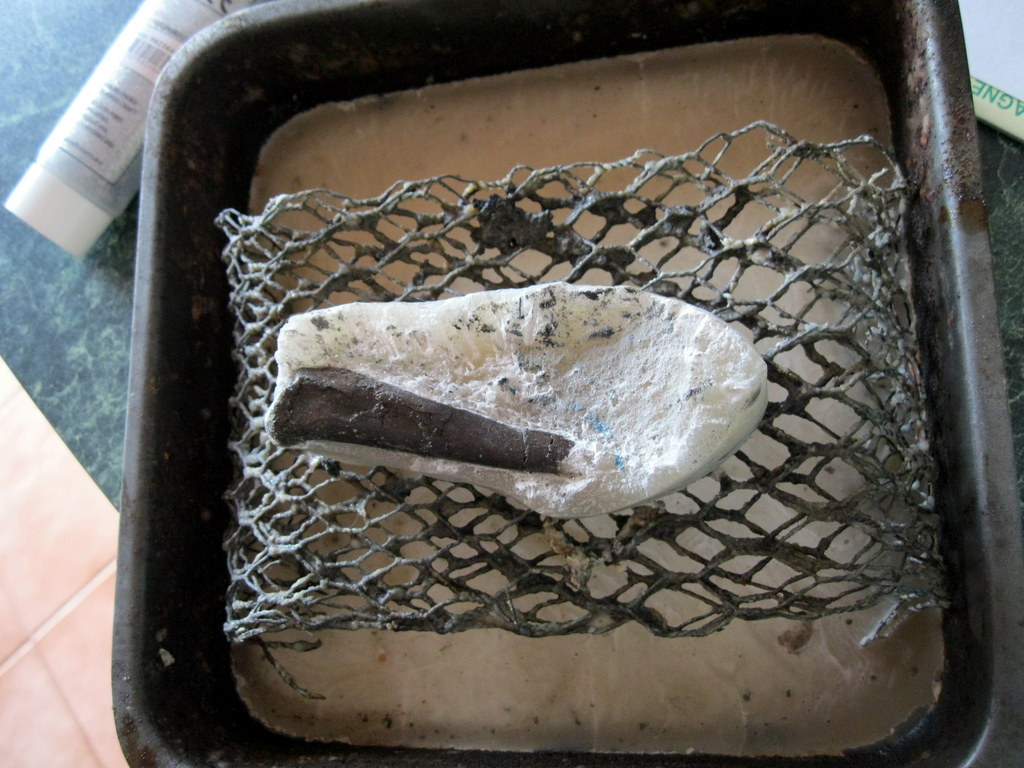
#10 melting peg.
#11 after melt.
#12 bone back together.
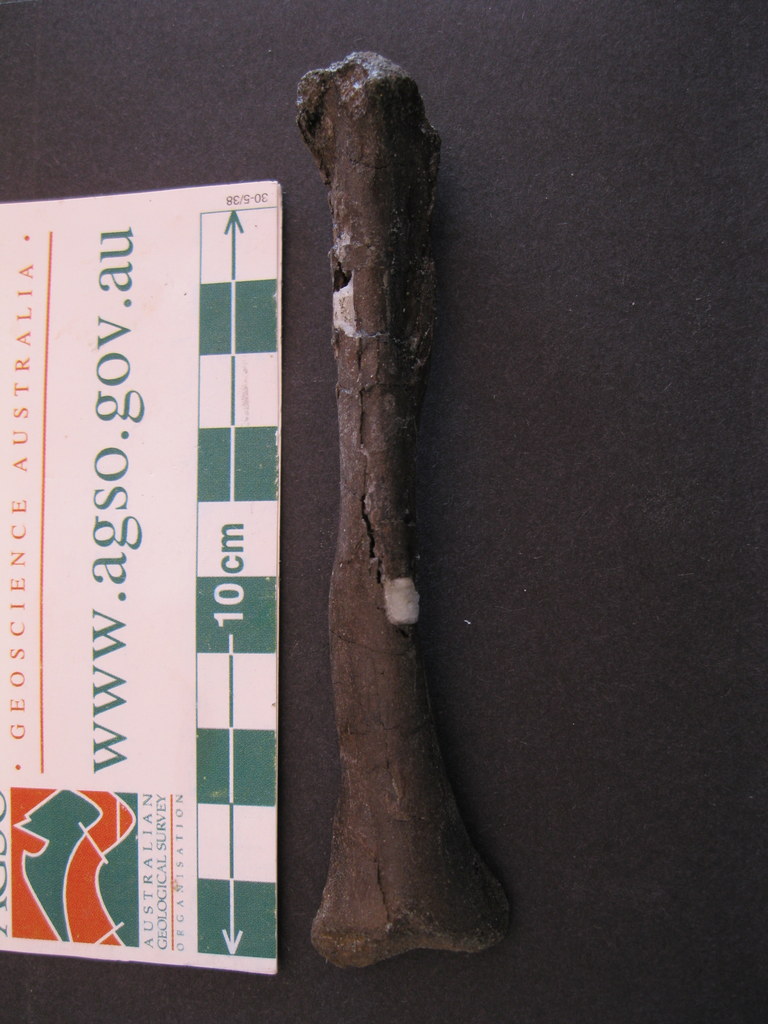
#13 finished tibia.
visits